Advice from a farmer-turned-gardener
Top 5 Most Challenging Common Garden Weeds (and how to control them organically!)

Top 5 Most Challenging Common Garden Weeds (and how to control them organically!)

Weeds can become a headache for even the most experienced of growers. Many weeds are easy to get rid of if you stay on top of them while others can be harder to control no matter how hard you try. The following guide focuses on some of the most challenging weeds in Michigan and how to control them organically.

While our focus here is on 5 most common noxious weeds found in gardens and farms in Michigan, many of the methods for control can be used with a variety of different weeds and in different climates.


Bindweed

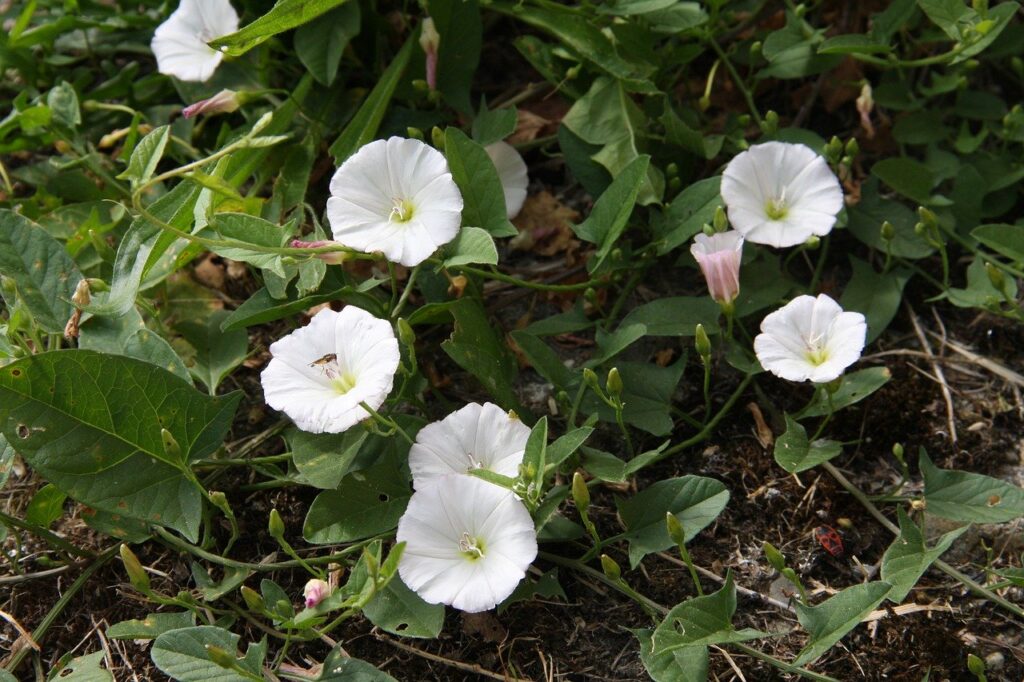
This noxious perennial weed is, by my vote, the most difficult to eradicate from the garden.

Bindweed Characteristics:

  • Vines up crops, steals resources from them, makes them more challenging to cultivate and harvest
  • Spreads by roots and seeds
  • Roots can be as deep as 12 feet!
  • Roots can spread as far as 10 feet laterally in just one season
  • Plants can regrow from a small section of root
  • Grows very quickly during warmer months

Tips for organic bindweed control:

1) Do not rototill bindweed

  • Rotoilling chops up and spreads bindweed; avoid tilling it at all costs!
    • If you must till an area with bindweed, do so at the flowering stage when most of the plant’s resources are focused above ground.
    • Always clean tillage equipment thoroughly before moving to a new space 
  • Try to remove as much of the bindweed root as possible, ideally using a digging fork or shovel

2) Use a spike-tooth/draw harrow for larger areas

tools for controlling weeds
drag harrow for controlling weeds

3) Use Cover Crops

Using cover crops as competition can help knock back bindweed on larger plots prior to cultivation. Thickly seeded Sorghum Sudangrass and Sunflowers are effective competitors.

4) Mulching

  • Mulching with woodchips does not help control bindweed – it thrives in this environment.
  • Using plastic or woven mulch can work to exhaust bindweed but take note of any holes or edges – the plants will find their way to light.

5) Weed early and often

  • Do what you can to knock plants back as they emerge. Hoe them as seedlings before roots establish.
  • If you have them in a space where you’re growing food and you cannot effectively uproot them, just continue to weed throughout the season, being mindful not to let them go to seed.

Quackgrass

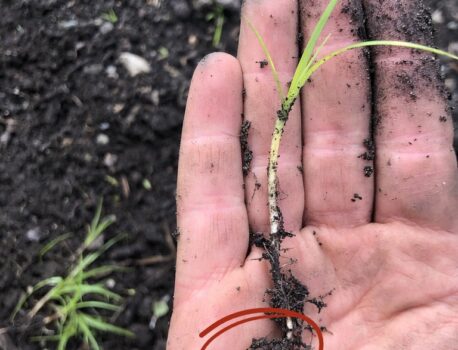
Quack Grass gets the runner-up prize for second most invasive perennial weed in my experience

quackgrass root

Quackgrass Characteristics:

  • Spreads through rhizomes which have sharp, pointy tips that can pierce anything that gets in their way, including root vegetables 
  • Rhizomes can grow up to 10 feet in length
    • If you’re trying to engage kids in the garden, consider a prize for the longest intact rhizome
  • Can regrow from a small piece of rhizome with no above-ground parts attached
quackgrass rhizome piercing potato

Tips for Organic Quackgrass Control

1) Do not rototill quackgrass

  • This is contested in some agricultural circles. I am against repeated rototilling to control quackgrass for the following reasons:
    • Although repeated tillage can deplete quackgrass resources, it is not good for soil health because it destroys soil aggregates and disrupts microbial habitats.
    • A mother plant can sprout from every piece of rhizome, multiplying the population instantly
    • Tilling can spread rhizomes to unaffected areas

2) Use tarps to solarize and kill quackgrass weeds

  • I’ve had success using black corrugated plastic to solarize/tarp heavily weeded areas
    • Plastic will cause the green part of the plant to desiccate and cause rhizomes to run around looking for light. They tend to run close to the surface of the soil and are easy to remove once plastic is removed. 
    • Clear plastic works especially well, letting sun through which heats up and fries the plants

3) Use a chisel plough + spike-tooth/drag harrow for larger areas

4) Hit quackgrass when it is most vulnerable

This is in the springtime, when plants are using the resources (sugars) in their rhizomes to sprout above-ground plants

5) Use cover crops

  • Using cover crops as competition can help knock back quackgrass on larger plots prior to cultivation.
    • Winter wheat can be effective because it competes for resources in early spring, when quackgrass is working to establish itself

Canada Thistle

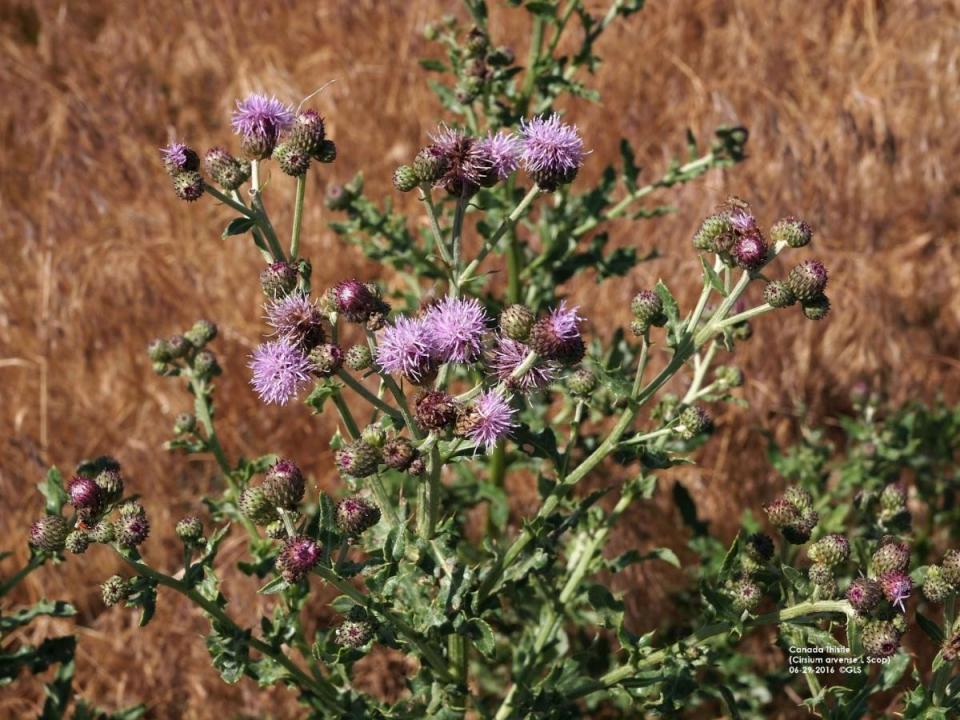
This rapidly growing perennial can wreak havoc if you let it get away from you

Canada Thistle Characteristics

  • Grows in patches
  • Spreads via roots and seeds carried by the wind
  • Can spread via roots 6-10 feet in one season
  • Seeds are umbrella shaped like dandelions’ and can remain viable for 20 years!
  • Plants are between 2-5 feet tall
  • It takes years to completely eradicate once established
  • Establishes deep taproots with lateral roots
  • Spikey and difficult to pull by hand – use gloves and a digging fork!
young canada thistle
young Canada thistle
flowering canada thistle
flowering Canada thistle

Tips for Organic Canada Thistle Control

1) Hit Canada thistle when it is most vulnerable

As with quackgrass, springtime is the best time to control Canada thistle organically, when plants are using the resources in their root systems to sprout above-ground plants

2) Never let Canada thistle go to seed!

As mentioned above, Canada thistle seed travels by wind similar to dandelion seed and can remain viable for up to 20 years!

3) Be thorough when digging roots

  • Roots can reach depths of 15’ if well established!
  • Make sure to remove all parts of the root as plants can resprout from even a small section of root

4) Mow repeatedly

  • Continuing to knock back Canada thistle patches by mowing or cutting repeatedly throughout the season can deplete their resources
  • They will continue to attempt flowering multiple times throughout the season so mowing once is not enough!

5) Use tillage for major infestations only

  • Repeated tillage can knock back thistle that has taken hold of a spot that is too large to dig effectively
  • If you choose this method, tillage will be required about every three weeks; in cold climates, a final tilling in the fall is critical to expose roots to killing frost
  • Note that you should always clean tillage equipment after usage so as not to spread the roots elsewhere

Yellow Nutsedge

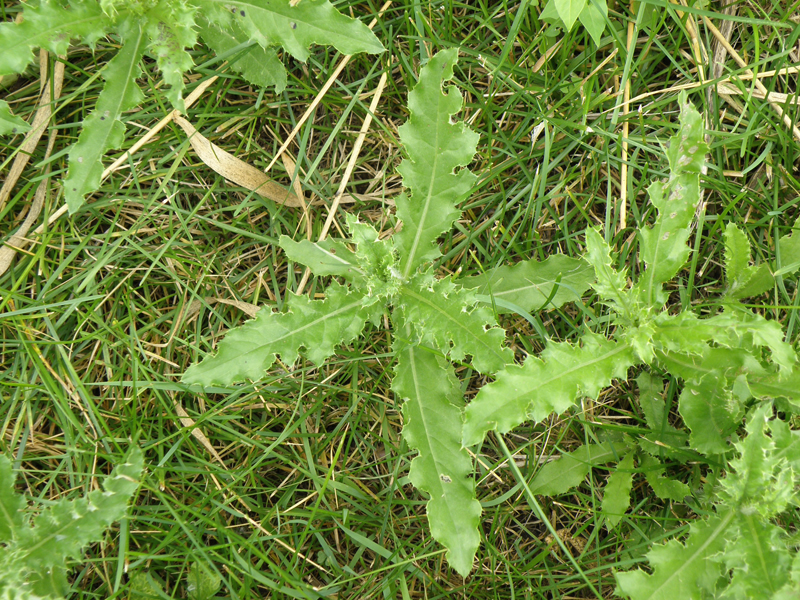
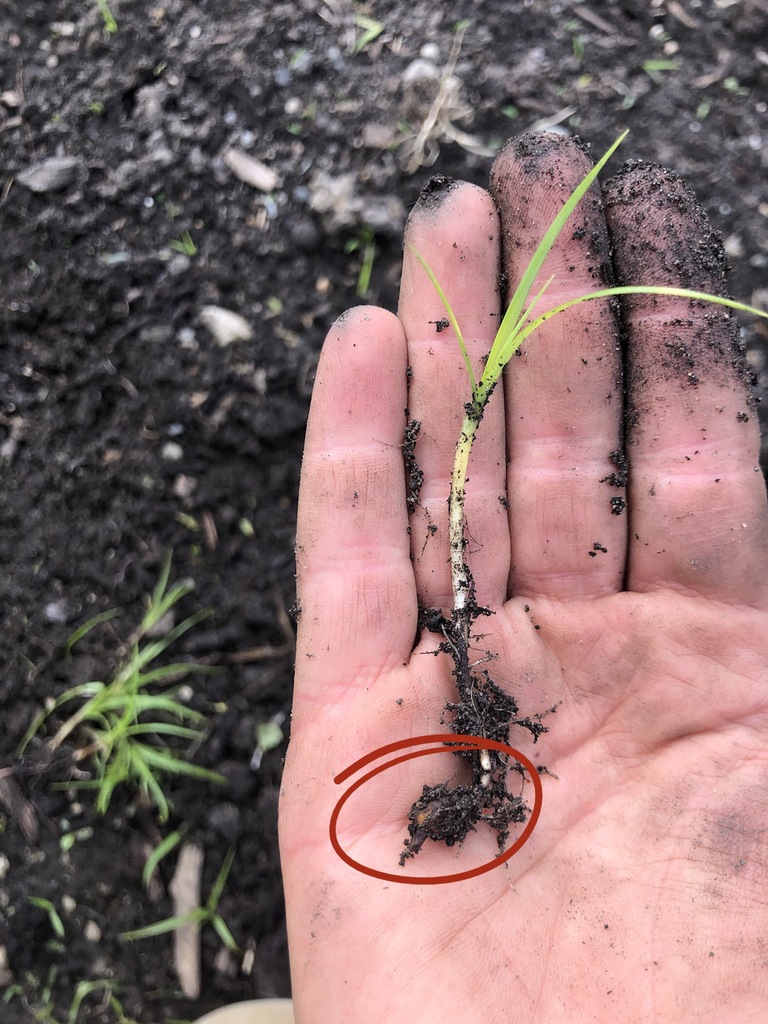
This trickster is sometimes mistaken for annual grass but can be very difficult to get rid of without consistent effort.

Yellow Nutsedge Characteristics

  • “Sedges have edges” – although the plant looks a bit like grass, the stems leaves are more triangular in shape
  • Plants reproduce through nuts (tubers) that can be found anywhere from 2-14” below the surface of the soil; when left behind these sprout new plants
  • The nuts are edible! (But not worth the trouble to collect and use, in my opinion)
  • Plants spread and colonize quickly
mature yellow nutsedge
mature yellow nutsedge plant

Tips for Organic Nutsedge Control

1) Dig deeply to completely to remove nut

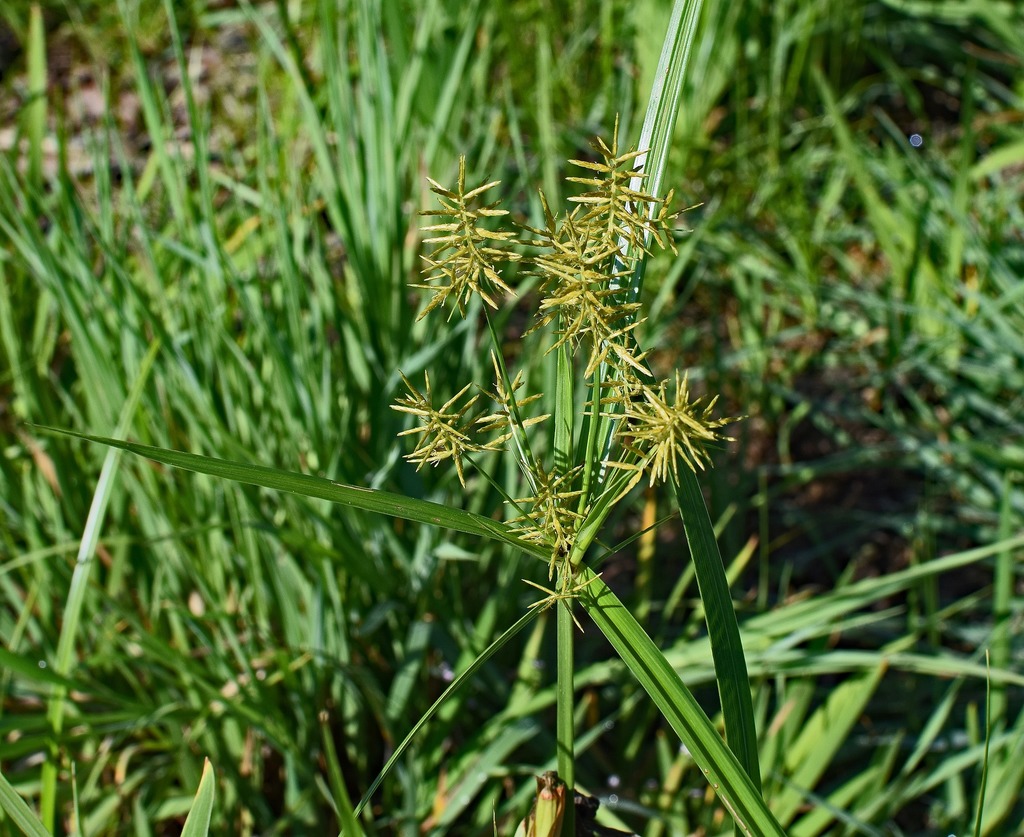
Simply pulling these weeds doesn’t work because the top of the plant detaches from its roots easily, leaving the nut behind to reproduce. These can be found 1-6 inches below the surface of the soil. Leave it behind and more will grow!

nutsedge nut
nut of nutsedge plant buried under soil

2) Easiest to control in the spring when plants are small

When plants are small, nuts tend to be closer to the surface of the soil and easier to remove without disturbing the garden

3) Do not let nutsedge go to seed

  • As with thistle, nutsedge can spread via seed and roots – cut these back to avoid seed dispersal
  • If you mow these plants they will continue to attempt flower throughout the season

Galinsoga (aka "quickweed")

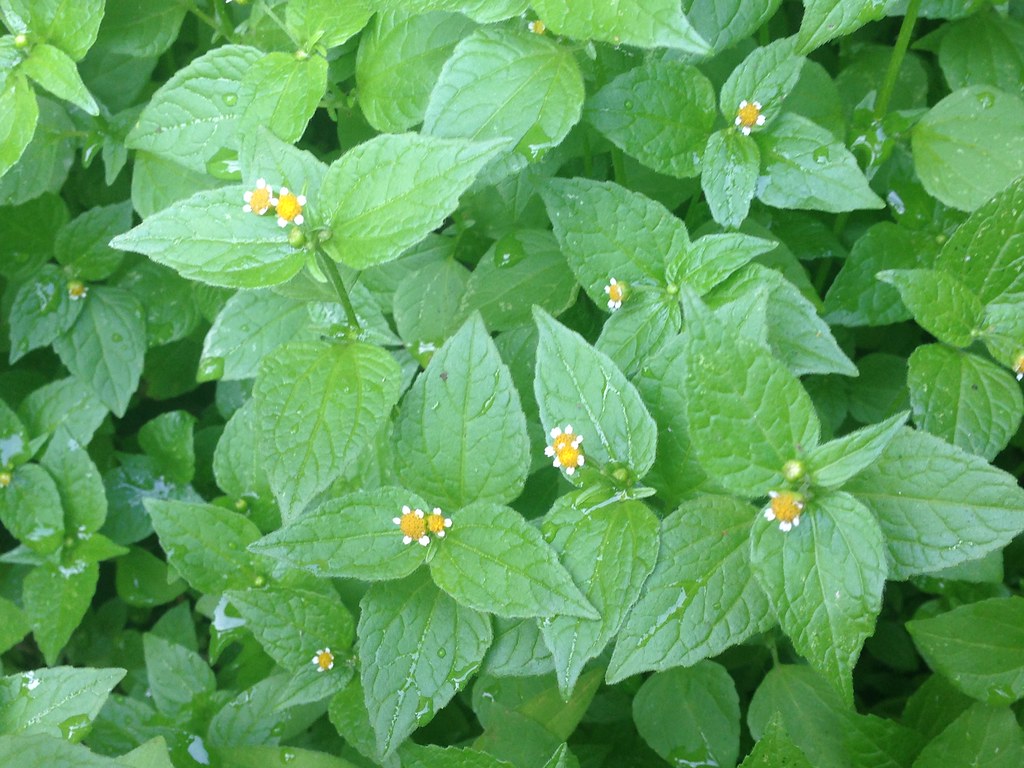
This aggressive annual weed is an unsuspecting one that tends to fly under the radar until it’s a problem. It’s commonly called quickweed because of how quickly it goes to seed and begins another generation.

Galinsoga Characteristics

  • Grows between 5 and 30 inches 
  • Shallow roots and small flowers with white petals and yellow center
  • Turn to seed and generate second generation incredibly quickly, within just a couple of weeks
  • Each plant can produce up to 7,500 seeds
  • Seeds have “hairs” that facilitate dispersal via wind or things that brush up against the plant
  • Edible and nutritious (although not very tasty)
  • Medicinal, good for stopping bleeding of minor cuts
galinsoga weed
galinsoga (aka "quickweed")

Tips for Organic Galinsoga Control

1) Use the stale seed bed method

  1. Till/prep the soil so that it is ready for planting.
  2. Then cover area with a tarp to trap in moisture and heat to facilitate germination of disturbed weed seeds.
  3. Remove tarp after 2-3 weeks and kill germinated seeds, ideally with a flame weeder. If you don’t have a flame weeder, remove weeds with a tool by scraping just the surface of the soil so as not to disturb and bring new weed seeds to the surface

This should be done 2-3 weeks prior to planting.

2) Use cover crops

Using cover crops as competition can help knock back galinsoga on larger plots prior to cultivation.

  • Mustard can be effective because it competes for resources in early spring, when quackgrass is working to establish itself
  • Thickly seeded vigorous crops like buckwheat and sorghum-Sudangrass compete well with these weeds in the summer

3) Do not let galinsoga go to seed!

  • As with other seeding weeds mentioned in this post, galinsoga spreads quickly by seed. Try to manually remove weeds before the small yellow and white flowers appear (seeds will follow within just a couple of days). 
  • Mowing/cutting back is generally ineffective because plants will regrow and go to seed faster than you can mow again! 

4) Be thorough when weeding

Make sure to remove the entire plant when weeding. Galinsoga can easily regrow from stems and roots left behind in moist soil

General tips for noxious weeds

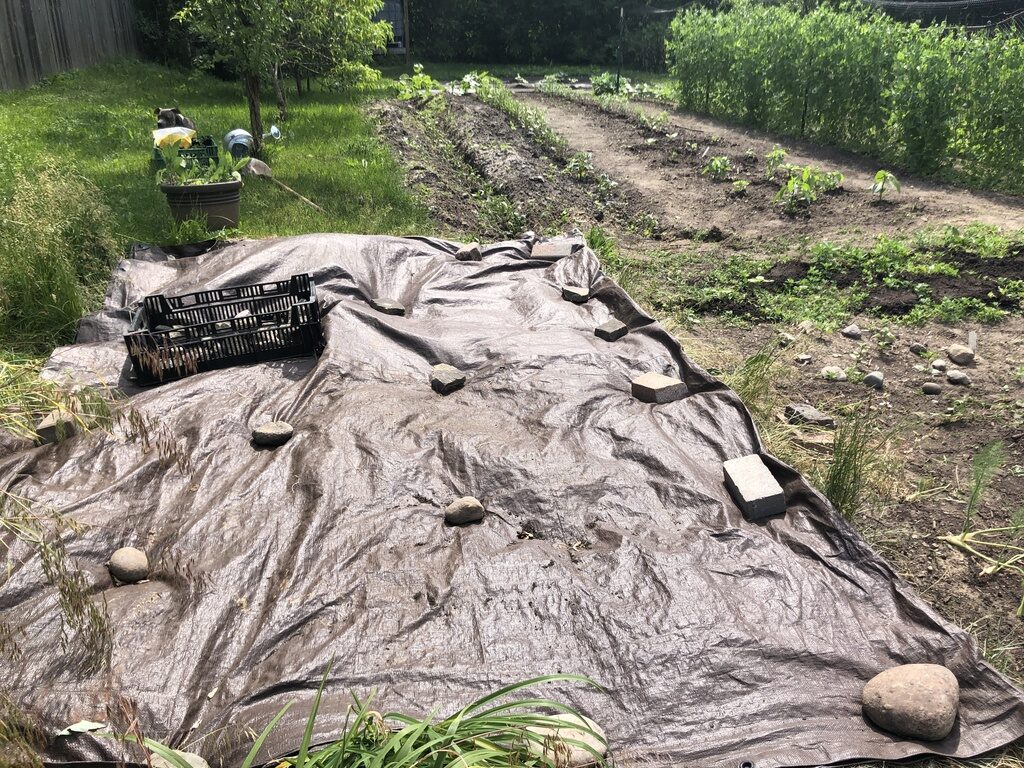
  • Never add noxious weeds to your compost pile. While the high temperatures of a well-managed pile should theoretically kill off seeds and rhizomes of these plants, it’s definitely not worth the risk if you plan to spread the compost anywhere on your land. Consider burning or throwing away all parts of noxious weed plants.

  • Many of the weeds that appear in the gardens and farms I’ve worked have come in through compost I’ve purchased. If you’re buying in bulk, make sure you’re buying from a trusted source. Ask for turning and temperature records – piles should be turned every three days over the course of two weeks and reach an internal temperature of between 131-170 degrees daily.