
Transplant production (also known as seedling production) is where it all starts for the home garden/farm. Whether you’re growing in a few raised beds or attempting to plant an acre of vegetables, how your seedlings are grown can set the tone for your entire season.
Most folks that I’ve talked to don’t know where to start and, to be honest, the internet hasn’t been much help. My experience is with growing transplants on a larger scale, for sale to farmers and gardeners as well as for my own vegetable production operation. I’ve grown primarily in a greenhouse but have been teaching beginning farmers and gardeners about how to set up a system in their home using lights.
The one question I always ask when setting up a human-made system: “What would Ma Nature do?”
There are 7 main areas included in the Seed Starting 101 post series:
- Lights
- Scheduling
- Containers
- Potting Media & Supplemental Fertility
- Seeds
- Water
- Troubleshooting
Transplant Production Basics
Growing seedlings is sort of like raising kids (except plants don’t spit up or talk back or ). The lifecycle of a transplant can be broken into four metaphorical stages: newborn, toddler/kiddo, pre-teen, and full-blown teenager (or germination, emergence & cotyledon stage, growing on, and hardening off). We’ll call them stages 1, 2, 3 & 4. Just like kids, transplants need more care at certain stages and encouragement to become independent of others. Light, water, heat, and nutrients are all needs that shift throughout a transplant’s life.

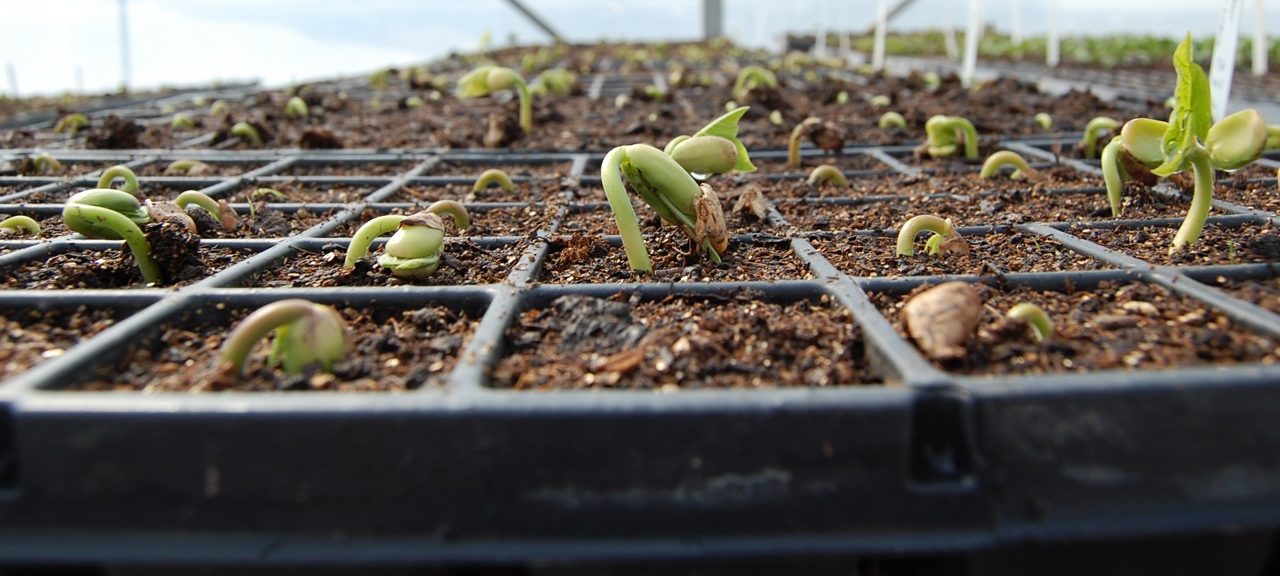
Germination
When your seeds are just germinating they need consistent attention including very regular watering (preferably with a mister of some sort) and lots of warmth. You don’t want to saturate the potting soil at this point because the little seeds don’t need very much moisture to germinate and too much can lead them to rot.
At this stage they don’t need light because they’re not yet photosynthesizing. In fact, they have enough nutrients inside of their little seed to unfurl their cotyledon leaves which are stored inside of the seed! All you need to do is give them enough water and heat and the magic will happen. As soon as you see the stem (or hypocotyl) emerge you’ll want to make sure to get them under lights or else they’ll stretch.
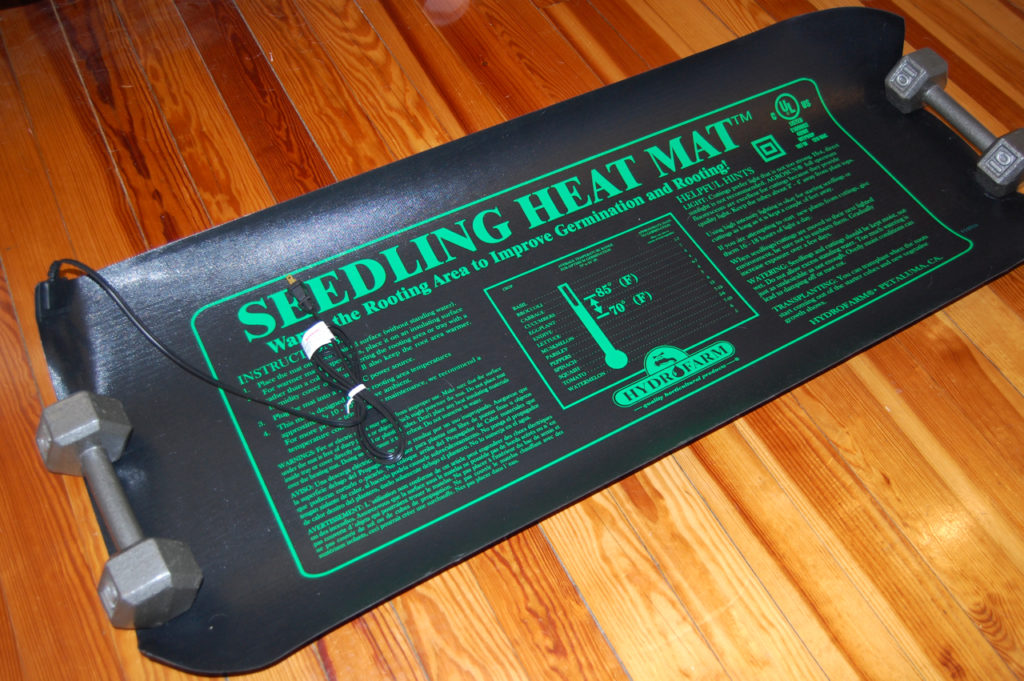
Sixty-five degrees is good for cool season crops (kale, lettuce, etc.) and warmer season crops prefer something closer to 80 degrees (tomatoes, peppers, basil). Generally you’ll be able to get most things to germinate above 60 degrees, it will just affect how long it takes. (Kale takes about three days to germinate at 65 degrees.)
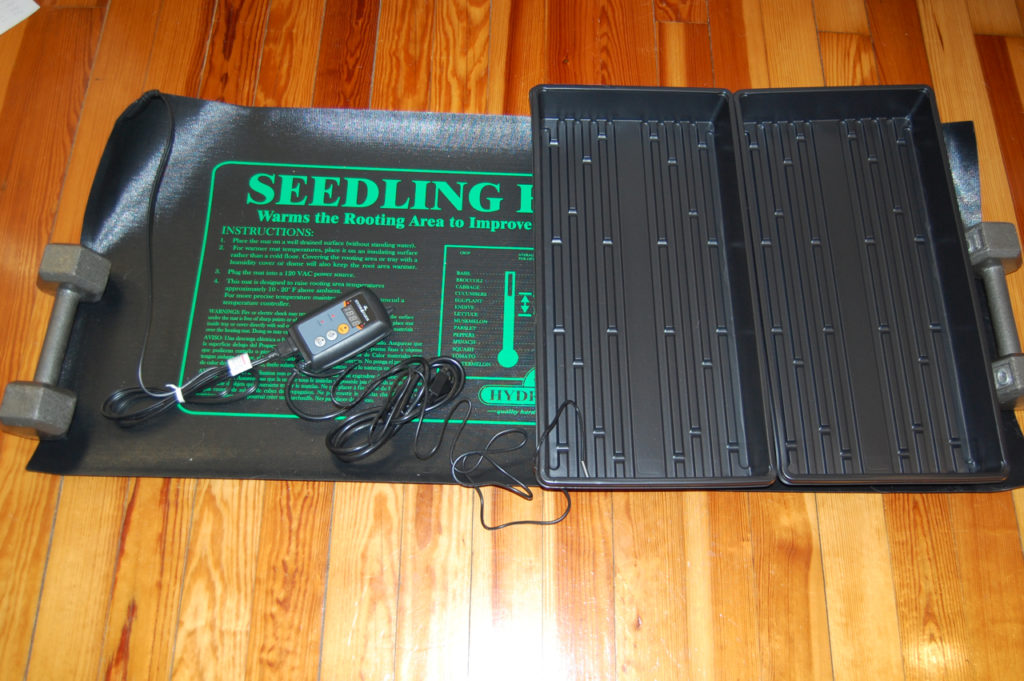
You can purchase a heat mat to achieve ideal germination temperatures but they can be pretty pricey. Germinating in the warmest spot in your house like on top of the fridge/near a radiator or adding a space heater next to your set-up are great free(ish) options.
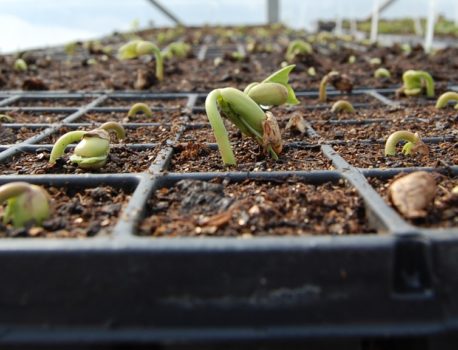
Emergence & Cotyledons
Once plants germinate they put out what are called cotyledon leaves. This is the time to add light! Roots also begin to shoot off of the radical (the initial little root that emerges from the seed) and begin foraging for nutrients. Plants can take more water at this point and you can begin watering them with a watering can instead of a mister. Just remember that they’re still small and don’t have a lot of plant to feed (like how toddlers eat less than teenagers) — you’re trying to encourage root-growth (independence) so you’ll want them to spend a little bit of time on the drier side.
Warmth is still important at this stage and most plants tend to do fine between 50 and 75 degrees Remember, the warmer things are the faster they’ll grow. (Kale takes about two days to move through this phase.)
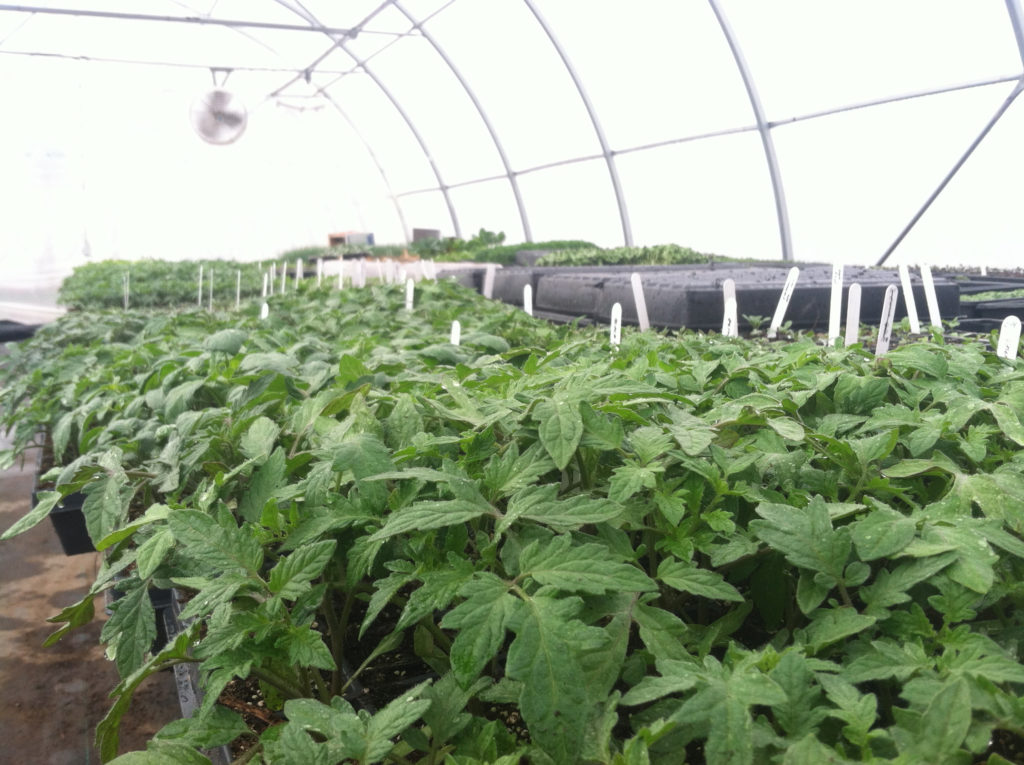
Growing On
Here plants are growing bigger and foraging for more nutrients but they haven’t quite filled up their growing container/cell with roots yet. Lots of light, temps above 50, and lots of water required. Most crops spend the majority of their transplant life in this stage. (For kale it’s about 2.5 out of the four weeks.)
Make sure not to let your plants become too “rootbound” in their cells; this can stress the plant out and cause the roots to have difficulty growing out once planted in the ground.
A good rule is if the roots hold the soil together in the form of the cell but you can break the roots apart and away from the soil easily, then you’re in good shape; if they don’t want to separate with ease and are tightly bound then they need to be planted or potted up asap! Feel free to check on the roots of your plant from time to too by lifting the cell out with a butter knife.
Hardening Off
Congratulations! Your plants are officially teenagers and about ready to leave the nest. You’ve given them lots of love and attention but now you’ll want to spend about the last week of their transplant life preparing them to withstand the elements in big scary world. (Get a job already!)
Their roots should have mostly filled out their container and, by the end of the week, the soil should be held together by roots and pull out of the container with ease. Let them dry out a little between waterings to the point of near-but-not-quite-wilting. (They won’t get watered every day in the garden so they better get used to it!)
Expose them to slightly cooler temperatures and brighter light than they’re used to by leaving them on the back deck during the day. Just be sure to ease them into it — a few hours in the beginning and all day and possibly overnight by the end of the week). Note that they may dry out more quickly being exposed to the elements outdoors. You don’t necessarily want to leave them out in the rain because too much water can cause nutrients to leech from the potting soil.
Always check the 10-day forecast before planting to make sure that weather is decent before planting. Although cool season crops like kale can handle very cold temps, it doesn’t mean they can handle freezing and snow on their third day in the garden. Tomatoes, peppers, and eggplants don’t like it much below 50. It takes a bit for plants to adjust from their transplant shock so you’ll want to make sure you set them up for success.
Want to know when a new topic is posted? Subscribe here!